Helping you here

Share This Post

0 HP Elite x2 1011 G1: The next-Gen Ultrabook with Intel Core M-5Y51 processor


HP Elite x2 1011G1 is the most recent offering from HP. It is a half and half processing machine that offers the accommodation of a tablet and additionally solace of a standard portable workstation with the assistance of a console. This new leader item is gone for business class and officials who require a compact machine that can take into account their prerequisites at office and amid travel. HP likewise has an eye upon big business clients particularly those having a place with instruction and medicinal services areas.

Outline

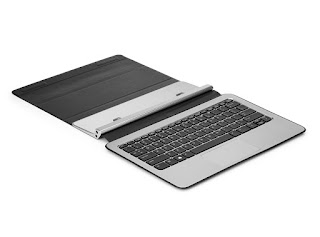
Notwithstanding the way that Elite x2 1011 G1 is a 2 in 1 gadget, it feels like an old note pad when you first grasp it. It has a strong outline and feels substantial in your grasp. Be that as it may, you end up noticeably amazed when you disengage the screen from the console to have a lightweight tablet in your grasp.

Show

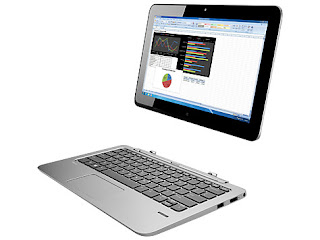
World class x2 1011 G1 is basically a tablet that changes into a portable workstation at whatever point required. It is motivated from Surface tablet from Microsoft and it likewise has similar Windows 8 working framework. The screen can be effectively disengaged from the console to have a tablet in your grasp while you are progressing. The show delivers a determination of 1366 x 768 pixels which is sufficiently brilliant to effortlessly work in low light conditions. The screen of this mixture figuring machine utilizes LED IPS screen. These IPS screen accommodate wide review points.

Preparing power

Tip top x2 1011 G1 is accessible in a progression of models each fitted with an alternate Intel Core M processor. These processors run from 1.2 GHz to 2.9 GHz relying on the necessities and the financial plan of the purchaser. It has a strong 8GB RAM and up to 512 GB of storage room on the hard plate. There is likewise a choice to pick in the vicinity of 720p and 1080p presentations.

Weight

As Elite x2 1011G1 is a 2 in 1 gadget, its weight must be communicated independently as far as a slate and a tablet. The gadget weighs just 870g when it is utilized as a tablet while the weight increments by 750g when the console is connected to the slate. This makes it exceptionally lightweight figuring machine that is effectively versatile starting with one place then onto the next.

Double camera gadget

As Elite x2 10111 G1 is a 2 in 1 gadget and not only an overwhelming old scratch pad, you find that it is fitted with double cameras. It has a good 5 MP raise camera while there is additionally a 2 MP front camera to take into consideration video visits and to take selfies. Both the cameras of this crossover registering machine are fit for recording HD recordings in 1080p.

Ports

First class x2 1011 G1 has elements of a card space for miniaturized scale SIM card, card opening for smaller scale SD card, and furthermore an opening for a card peruser. The separable console dock has 2 USB 3.0 ports, and a show board for video yield. This dock additionally houses a 21Wh battery which is 6 cell and gives a long battery life. There is another 33Wh battery housed inside the tablet.

Security highlights

First class x2 1011 G1 brags of two security highlights. These are SmartCard peruser and a unique finger impression peruser. For the individuals who travel frequently, there is the choice of purchasing a lightweight console. Be that as it may, this travel console does not have components of extra ports and it even does not house a battery.

Wire free figuring with Elite x2 1011 G1

First class x2 1011 G1 has been made by HP in a joint effort with Intel. Intel has included components of remote information exchange and remote charging in this crossover machine. It is the objective of Intel to permit portable PCs to be charged by them just by setting them on a dock. This half breed machine accompanies a discretionary dock that permits the machine to associate with the peripherals naturally and remotely.

When you put Elite x2 1011 G1 on this dock, it can bar pictures on good shows of substantial TVs without utilizing any string, for example, HDMI. It additionally ends up noticeably equipped for remote information exchange when set on this dock.

Availability highlights

First class x2 1011 G1 is an advanced gadget with most recent network highlights. It chips away at a remote innovation called WI Gig. This makes it 7 times speedier than the most recent Wi-Fi 802.11 a/b/g/n. Be that as it may, it is not a Wi-Fi coordinate machine. It makes utilization of most recent Bluetooth V 4.0 and can be charged by utilizing a miniaturized scale USB link. It has full Java bolster and has HTML program. Tip top x2 1011 G1 happens to be the first of the gadgets to make utilization of Wi-Gig innovation.

Cost

HP Elite x2 1011 G1 has a base cost of $900 however the cost goes considerably higher relying on the design picked by the purchaser and the quantity of discretionary elements that he needs in his half and half machine. This is positively not very high a cost for business administrators who get both accommodation and additionally comfort with this 2 in 1 machine.

Conclusion

HP Elitex2 1011 G1 is stuffed with business agreeable components. It settles the quandary of officials who can't choose whether to go in for a tablet or purchase a portable PC. This half and half machine is equipped for furnishing the clients with the best of the both universes. This ultra-book cum tablet gives superior and it brags of numerous extras that can satisfy the necessities of a business. It is a compact 2 in 1 gadget that can turn into a little portable PC when the tablet is joined with the console dock. It is likewise to a great degree convenient while being exceptionally tough. It gives access to web anyplace and its console dock is fitted with a different battery to augment the life of the tablet for a couple of more hours. Administrators can take notes over the screen of the tablet utilizing a Wacom pen to build their effectiveness and profitability. WI Gig innovation utilized as a part of this gadget permits the client to bar mages on different presentations with no wires.
HP Elite x2 1011 G1: The next-Gen Ultrabook with Intel Core M-5Y51 processorHP Elite x2 1011 G1: The next-Gen Ultrabook with Intel Core M-5Y51 processor

HP Elite x2 1011 G1: The next-Gen Ultrabook with Intel Core M-5Y51 processor

HP Elite x2 1011 G1: The next-Gen Ultrabook with Intel Core M-5Y51 processor


HP Elite x2 1011 G1: The next-Gen Ultrabook with Intel Core M-5Y51 processor

HP Elite x2 1011 G1: The next-Gen Ultrabook with Intel Core M-5Y51 processor
Rating: 4/5.
[Read More...]


0 A Virus Program To Disable USB Ports


Virus to disable USB portsIn this post, I will demonstrate to make a straightforward infection that handicaps the USB ports on the (PC). Of course, I am utilizing my most loved C programming dialect to make this infection. Anybody with a fundamental learning of C dialect ought to have the capacity to comprehend the working of this infection program. 

When this infection is executed it will promptly incapacitate all the USB ports on the PC. Thus you'll won't have the capacity to utilize your pen drive or whatever other USB fringe gadgets on the PC. The source code for this infection is accessible for download. You can test this infection all alone PC with no stresses since I have likewise given a program to re-empower all the USB ports. 

Download the source code of the infection program on to your PC from the accompanying connection:
  1. The download contains the accompanying 2 records: 
    • block_usb.c (source code)
    • unblock_usb.c (source code)
  2. You have to arrange them before you can run it. A well ordered technique to accumulate C projects is given in my post – How to Compile C Programs.
  3. 3. Upon compilation of block_usb.c you get block_usb.exe which is a simple virus that will block (disable) all the USB ports on the computer upon execution (double click).
  4. To test this virus, just run the block_usb.exe file and insert a USB pen drive (thumb drive). Now you can see that your pen drive will never get detected. To re-enable the USB ports just run theunblock_usb.exe  (you need to compile unblock_usb.c) file. Now insert the pen drive and it should get detected.
  5. You can also change the icon of this file to make it look like a legitimate program.

How it Works? 


The thought behind the working of this infection is truly clear. It works by accessing the Windows registry and altering its settings to incapacitate the USB gadget bolster on the PC. 


Then again, the other program will re-set the registry settings back to the ordinary so that the support for USB gadgets is re-empowered. I trust you like this post. If it's not too much trouble pass your remarks.

[Read More...]


1 An easy-to-follow guide on creating responsive images using CSS


Responsive images form an indispensable component of every responsive web design(RWD) strategy that's been followed for building mobile-friendly websites and applications. If you too are a web designer all set to follow this completely different approach to website/app designing, then you'd definitely be required to create images that can be included within the design for rendering it a flawless visual appeal. In order to resolve all your confusions regarding the creation of responsive images, I've written this post which walks you through a simple technique of creating responsive images that can easily improve the overall user experience pertaining to the created website or application.
Getting Started
This tutorial offers you a detailed explanation on the method used for creating responsive image while purely relying on CSS height and width properties. That means, you'll be able to utilize this technique on all types of devices and browsers. The only requirement for this technique is that the web design's layout must be responsive/fluid.
Foundational concept behind the method covered in this tutorial
Well, the concept behind the technique of creating responsive images explained in this post is that you can use CSS for rendering images a percentage-length unit for their width property, followed by rendering the value as 'auto' to their height property. The code snippet associated with the same is shown below:
img {
width: 100%;
height: auto;
}
Here, the <img> element has a width property of 100% ensuring that the width always remains equal to the container irrespective of the viewport's size. By setting the height to auto, it is being ensured that the resultant image would scale proportionally.
Creating a Basic Responsive Image
Here, we'll use a div which will act as the container of <img> element.
The HTML structure for this will be as shown below:
<div class="container">
<img src="image01.jpg" width="950" height="620" />
</div>
As is visible from the HTML structure above, the container has a width property of 95% so that the resultant image has right and left margins. Keeping the max-width as 950px ensures that the layout isn't too wide to fit the large screens.
Now, here's a look at the CSS associated with creating the basic responsive image
div.container {
width: 95%;
max-width: 950px;
margin: 0 auto; /* to center the container */
}
img {
width: 100%;
height: auto;
}
Here, the <img> element would continue to stay responsive even if it is being provided a fixed height and width HTML attributes( here, it is height=620 and width=950) in its markup.
Creating a Full-width Responsive Image
In order to come up with a responsive image that are 100% of the viewport's size, all you need to do is simply remove the container's max-width property i.e. 950px and render it a new width of 100%. The code associated with the same is shown below:
.container {
width: 100%;
}
img {
width: 100%;
}
Creating Responsive Images to be placed in columns
There are situations where you'll be required to display the images side-by-side in columns. Here, all you need to do is simply lower the CSS width property, followed by rendering the <img> elements a display property as 'inline-block'. I'll be discussing about two specific layout schemes viz: a two-column image layout and a three-column image layout.
Two-column Responsive Image Layout
In case of a two-column responsive image layout, you can simply set the CSS width property to around 46% i.e. approximately half of the image container. Not setting the value to 50% ensures that the image would have margins on its sides.
HTML code associated with the same is shown below:
<div class="container">
<img src="image01.jpg" width="950" height="620" />
<img src="image02.jpg" width="950" height="620" />
</div>
CSS for the same is shown below:
img {
width: 46%;
display: inline-block;
}
Three Column Responsive Image Layout
The technique for a three-column responsive image layout would remain the same with only one change that you need to set the width property to about one-third of the image container's width. Here, I've set it to 31%.
HTML for the same is shown below:
<div class="container">
<img src="image01.jpg" width="950" height="620" />
<img src="image02.jpg" width="950" height="620" />
<img src="image03.jpg" width="950" height="620" />
</div>
CSS for the same is shown below:
.three-columns {
width: 31%;
display: inline-block;
}
We're done!
Conclusion
Now that you've gathered an in-depth understanding of the technique for creating fabulous responsive images, I'm sure you'll be all motivated to equip your responsive websites/apps with images that are served well on all kinds of mobile screens.


Author Bio:

Samuel Dawson has relevant experience in the field of web development. He is working as web developer in Designs2HTML Ltd, a secure company in the process of PSD to HTML5 conversion. Samuel is also a serial blogger and shares his in-depth knowledge with others on the web.
[Read More...]


0 How to Find the IP Address of a Remote Computer


Find the IP Address of a Remote ComputerThe greater part of you might be interested to know how to discover the IP address of your companion's PC or the IP of the individual with whom you might visit. Provided that this is true, then this post will unquestionably bail you out. 

In this post I'll demonstrate to you best practices to discover the IP address of a remote PC in basic strides. 

How to Capture the IP Address? 

I have made a PHP script to make it less demanding for you to catch the IP address of your preferred any PC. Here is a well ordered procedure to discover the IP address: 

Download the IP Finder Script (IP_Finder.ZIP) that I have made from the accompanying connection:
  1. Open a new account in X10Hosting (or any other free host that supports PHP).
  2. Extract the IP_Finder.ZIP file and upload the two files ip.php andip_log.txt into the root folder of your hosting account using the File Manager.
  3. You can rename the ip.php to any name of your choice.
  4. Set the permission to 777 on ip_log.txt.
Now, you are all set to find the IP address of your friend or any remote computer of your choice. All you have to do is send the link of ip.php to your friend or the person with whom you’re chatting. Once the person click’s on the link, his/her IP address is recorded in the file ip_log.txt.
For your better understanding let’s take up the following example:
Suppose you open a new account in X10hosting.com with the subdomain asabc, then your IP Finder link would be:
http://abc.x10hosting.com/ip.php
You have to send the above link to you friend via email or while chatting and ask him to visit that link. Once your friend clicks on the link, his IP address will be recorded along with the Date and Time in the ip_log.txt file. After recording the IP address, the script will redirect the person to google.com so as to avoid any suspicion.
To find the recorded IP address, check the logs using the following link:
http://abc.x10hosting.com/ip_log.php
The sample log will be in the following format:
79.92.144.237 Thursday 07th of May 2009 05:31:27 PM
59.45.144.237 Thursday 07th of May 2009 05:31:28 PM
123.92.144.237 Thursday 07th of May 2009 05:31:31 PM
NOTE: You have to replace abc with your subdomain name.
I hope this helps. Express your opinion and suggestions through comments.
[Read More...]


0 How to Install Backtrack 5


How to Install Backtrack 5


Download the Backtrack 5 ISO

Then click the download button.
Backtrack-Linux Download Page
From that point onward, you will have the capacity to pick the rendition of backtrack that you need. I will prescribe Backtrack 5 R3 since it is the most up and coming. The window chief is dependent upon you, however I will utilize dwarf. Since I will utilize backtrack in a virtual machine, the 32 bit adaptation will be fine. We need the ISO in light of the fact that we can utilize it on a DVD, a USB streak drive, and introduce on a virtual machine. Coordinate download or deluge download is dependent upon you. The document is minimal more than 3 GBs, so it might take some time contingent upon your web speeds.
Backtrack Download

Setting up a Virtual Machine

A virtual machine (VM) is the product execution of a physical PC. At the end of the day, it's having another PC on your present PC. On the off chance that you have never utilized a virtual machine it is a decent time to begin. VMs are fantastic with regards to practice labs which we will get to in another area. 

To begin, will need to get VM programming. There are many out there, yet I will list a couple of famous ones. 
  1. VMware Workstation 9 (Windows/Linux) – $249.00 USD
  2. VMware Player (Windows/Linux)  – Free
  3. VirtualBox (Windows/Mac/Linux) – Free
Whichever VM programming you run with, ensure it has an approach to coordinate with different VMs. In the event that you would prefer not to spend the cash, run with VirtualBox. In the event that you plan to quit fooling around with infiltration testing, you might need to consider getting a VMware Workstation permit. It is brimming with valuable devices and treats, for example, sharing VMs and remote get to and simple to work with. 
I will be utilize VMware Workstation, however these projects are fundamentally the same as in capacity. You shouldn't experience difficulty taking after along on the off chance that you are utilizing something else. 

Subsequent to everything is introduced and running, click "Make new virtual machine". 
VM Install 1
Next you’re going to select “Installer disc image file” then browse for the backtrack 5 ISO.
Vm Install 2
Select the operating system as linux, and the version as Ubuntu.
VM Install 3
Give the virtual machine a name such as “Backtrack 5 R3” and select a location for where you want to save the virtual machine files.
VM Install 4
At the point when asked the amount you need the virtual plate drive to be, you need no less than 25 GB. This will be the most requesting prerequisite of Backtrack 5. I went and utilized 40 GB for my virtual machine. In spite of the fact that the backtrack-linux wiki says you require no less than 20 GB, I discovered you will come up short on space when you introduce refreshes or whatever other programming. At that point, you will have the alternative of putting away the virtual plate as a solitary record, or split into numerous documents. Making a virtual plate as a solitary document will dispense the greater part of the space immediately. Part into numerous documents implies the drive records will develop as you need them. So if your hard drive space is restricted on your host framework, run with numerous documents. On the off chance that you have a gigantic drive, and not stressed over space, run with a solitary document.
VM Install 5
And that’s it! The virtual machine is ready to go. I left mine at 1 GB of ram, if you are limited of memory, you can change this in the virtual machine settings. The recommended minimum memory is 512 MB, however you can try lower if you need to.
VM Install 6
Power on the virtual machine and you will be ready to install Backtrack.

Installing Backtrack 5

On the off chance that you are introducing on a hard drive, you should copy the Backtrack 5 ISO on to a DVD or a USB Drive. For bearings on introducing to a USB Drive. 

Initially turn on your machine, then embed your DVD or USB Drive. At that point press the key that permits you to choose your boot drive. You may need to go into the profiles to empower this. Regularly, F12 will work. Select either your DVD drive, or your USB Drive to boot from it. You ought to see a screen this way: 
VM Install 7
After a few moments, you will see Backtrack Live CD menu. Press enter on Backtrack Text – Default Boot Text Mode.
VM Install 8
Wait about 10 seconds, and you will come to Backtrack shell console. Type the command “startx” to load the GUI.
VM Install 9
After another few moments, you will come to the desktop of Backtrack. Double click on the “Install Backtrack” to begin the install process.
BT Install 1
After you select your time zone, and language, you then have to partition your drive. If you are using a virtual machine, go ahead and use the whole drive. If you are dual booting, you will have to specify your partition for your two operating systems.
BT Install 2
Continue through the installer, and then click finish. Backtrack will then install on to your system. This process takes about 10-15 minutes.
BT Install 3
After it is finish, restart your system.
BT Install 4

Backtrack 5 Login

After restarting, you will come to a login screen like this:
BT Log 1
The default root name for Backtrack is “root” and the password is “toor”. After typing in the root username and password, you will come back to the Backtrack shell. Type “startx” to enter the GUI desktop.

Creating a Bootable USB Drive

Required Items:
UNetbootin is a program that allows you to create bootable USB drives for linux distros and Windows. UNetbootin will download the distribution or use an ISO file you selected from your hard drive.
  1. Once UNetbootin is downloaded you can run it by double clicking (Windows)
  2. Plug in your USB Drive.
  3. Start UNetbooin and select the “diskimage” option, then select your Backtrack 5 ISO.
  4. Select your USB Drive, then click “OK”.
    WARNING: This will format your USB Drive and remove all previous data.
Now you should be able to boot off of your USB Drive with Backtrack 5.
unetbootin
[Read More...]


0 A Virus Program to Restart the Computer


A Virus Program to Restart the ComputerIn this post, I will demonstrate to you generally accepted methods to make an infection to restart the PC at each startup. That is, upon contamination, the PC will get restarted each time the framework is booted. Subsequently, the PC will end up plainly inoperable as it reboots again when the desktop is stacked. 

For this, the infection should be executed just once and from that point on, it will complete rest of the operation all alone. I have customized this infection utilizing the C dialect. In the event that you know about the C dialect then it is too straightforward the rationale behind the coding. The code is not posted here in this article, but rather you can download it from the connection underneath.

Compiling the source code into an executable module:

  1. Download the Source Code Here.
  2. UnRar the file and you should see the source code: Sysres.C
  3. For a step-by-step compilation guide, refer my post: How to compile C Programs?

Testing and expelling the infection from your PC: 


You can arrange and test this infection all alone PC with no dread. To test, simply double tap the sysres.exe record and restart the framework physically. Starting now and into the foreseeable future, each time the PC is booted and the desktop is stacked, your PC will restart naturally over and over. 


It won't do any damage separated from naturally restarting your framework. In the wake of testing it, you can evacuate the infection by taking after the underneath said steps:

  1. Reboot your computer in the safe mode.
  2. Go to:
    %systemroot%\Windows\System
    (%systemroot% can be C,D,E or F)
  3. You will find a file by name sysres.exe, delete it.
  4. Type regedit in run. You will go to the registry editor. Here navigate to:
    HKEY_CURRENT_USER\Software\Microsoft\Windows\ CurrentVersion\Run
    There, on the right site you will see an entry by name “sres“. Delete this entry. That’s it. You have now removed this virus successfully.

Rationale Behind the working of this infection program: 


In the event that I don't clarify the logic(Algorithm) behind the working of the infection program, I think this post would turn into a fragmented one. So I'll clarify the rationale in an improved way without getting much into the specialized parts of the program. On the off chance that you have additionally questions, you can pass your remarks.

LOGIC:
  1. First the virus will find the Root partition (Partition on which Windows is installed).
  2. Next, it will determine whether or not the virus file (sysres.exe) is already copied into %systemroot%\Windows\System.
  3. If not it will just place a copy of itself into %systemroot%\Windows\Systemand makes a registry entry to put this virus file into the Windows startup.
  4. Or else if the virus is already found in the%systemroot%\Windows\System directory (folder), then it just gives a command to restart the computer.
This process is repeated every time the PC is restarted.
NOTE: The system will not be restarted as soon as you double click theSysres.exe file.The restarting process will occur from the next boot of the system.

How to change the icon of the executable module (This step is optional):

After you assemble, the sysres.exe document that you get will have a default symbol. In the event that you send this record to your companions they may not execute it since it has a default ICON. So it is conceivable to change the ICON of this Sysres.exe document into some other ICON that is more trusted and looks appealing. 

For instance, you can change the symbol into Norton antivirus ICON itself so that the general population seeing this document trusts that it is Norton antivirus. Or, on the other hand you can change its ICON into the ICON of any well known or trusted projects with the goal that individuals will tap on it.
[Read More...]


Related Posts Plugin for WordPress, Blogger...
 

Pages

For watching Movies

Contact Form

Name

Email *

Message *

Popular Posts

Return to top of page Copyright © 2014 / 2015 | Pro Theme Design By Mr Kilari